ownMDMownMDM
ProductDocsSecurityStatus
esc
  • Getting started

  • Software

  • Getting started

  • Devices

  • Compliance

  • Administration

  • Software

  • Devices

  • Getting started

↑↓ navigate↵ openesc close←→ prev / next page

Language

Open Console

Getting started

Quick start8 stepsHow ownMDM works4 minEnrolling your first Mac5 minSelf-hosting ownMDM

Devices

Managing your devicesUsing saved filters

Software

Deploying software to your fleetThe app catalog and requests

Compliance

Understanding compliance status

Administration

Users, roles, and permissions
Wiki/Getting started/Quick start
Getting started4 min readInteractive · 8 steps

Quick start

This is the shortest path through the whole product. You will enrol one Mac, put an app into your software repository, assign it, and watch it arrive. Everything you do here is the same thing you will later do for a hundred machines.

Budget about ten minutes. Most of it is waiting for a download and a check-in.

Before you begin

  • An ownMDM account that can manage devices and software
  • One test Mac running macOS 12 or later, with administrator access
  • An installer you can practise with — a .pkg or .dmg

You do not need the Mac in front of you. Everything below works with the machine on someone else's desk.

Note: ownMDM does not use Apple Business Manager, Automated Device Enrollment or APNs, and it does not install a configuration profile. A Mac joins by installing a signed package. If you have used a push-MDM before, this is the part that works differently.

The walkthrough

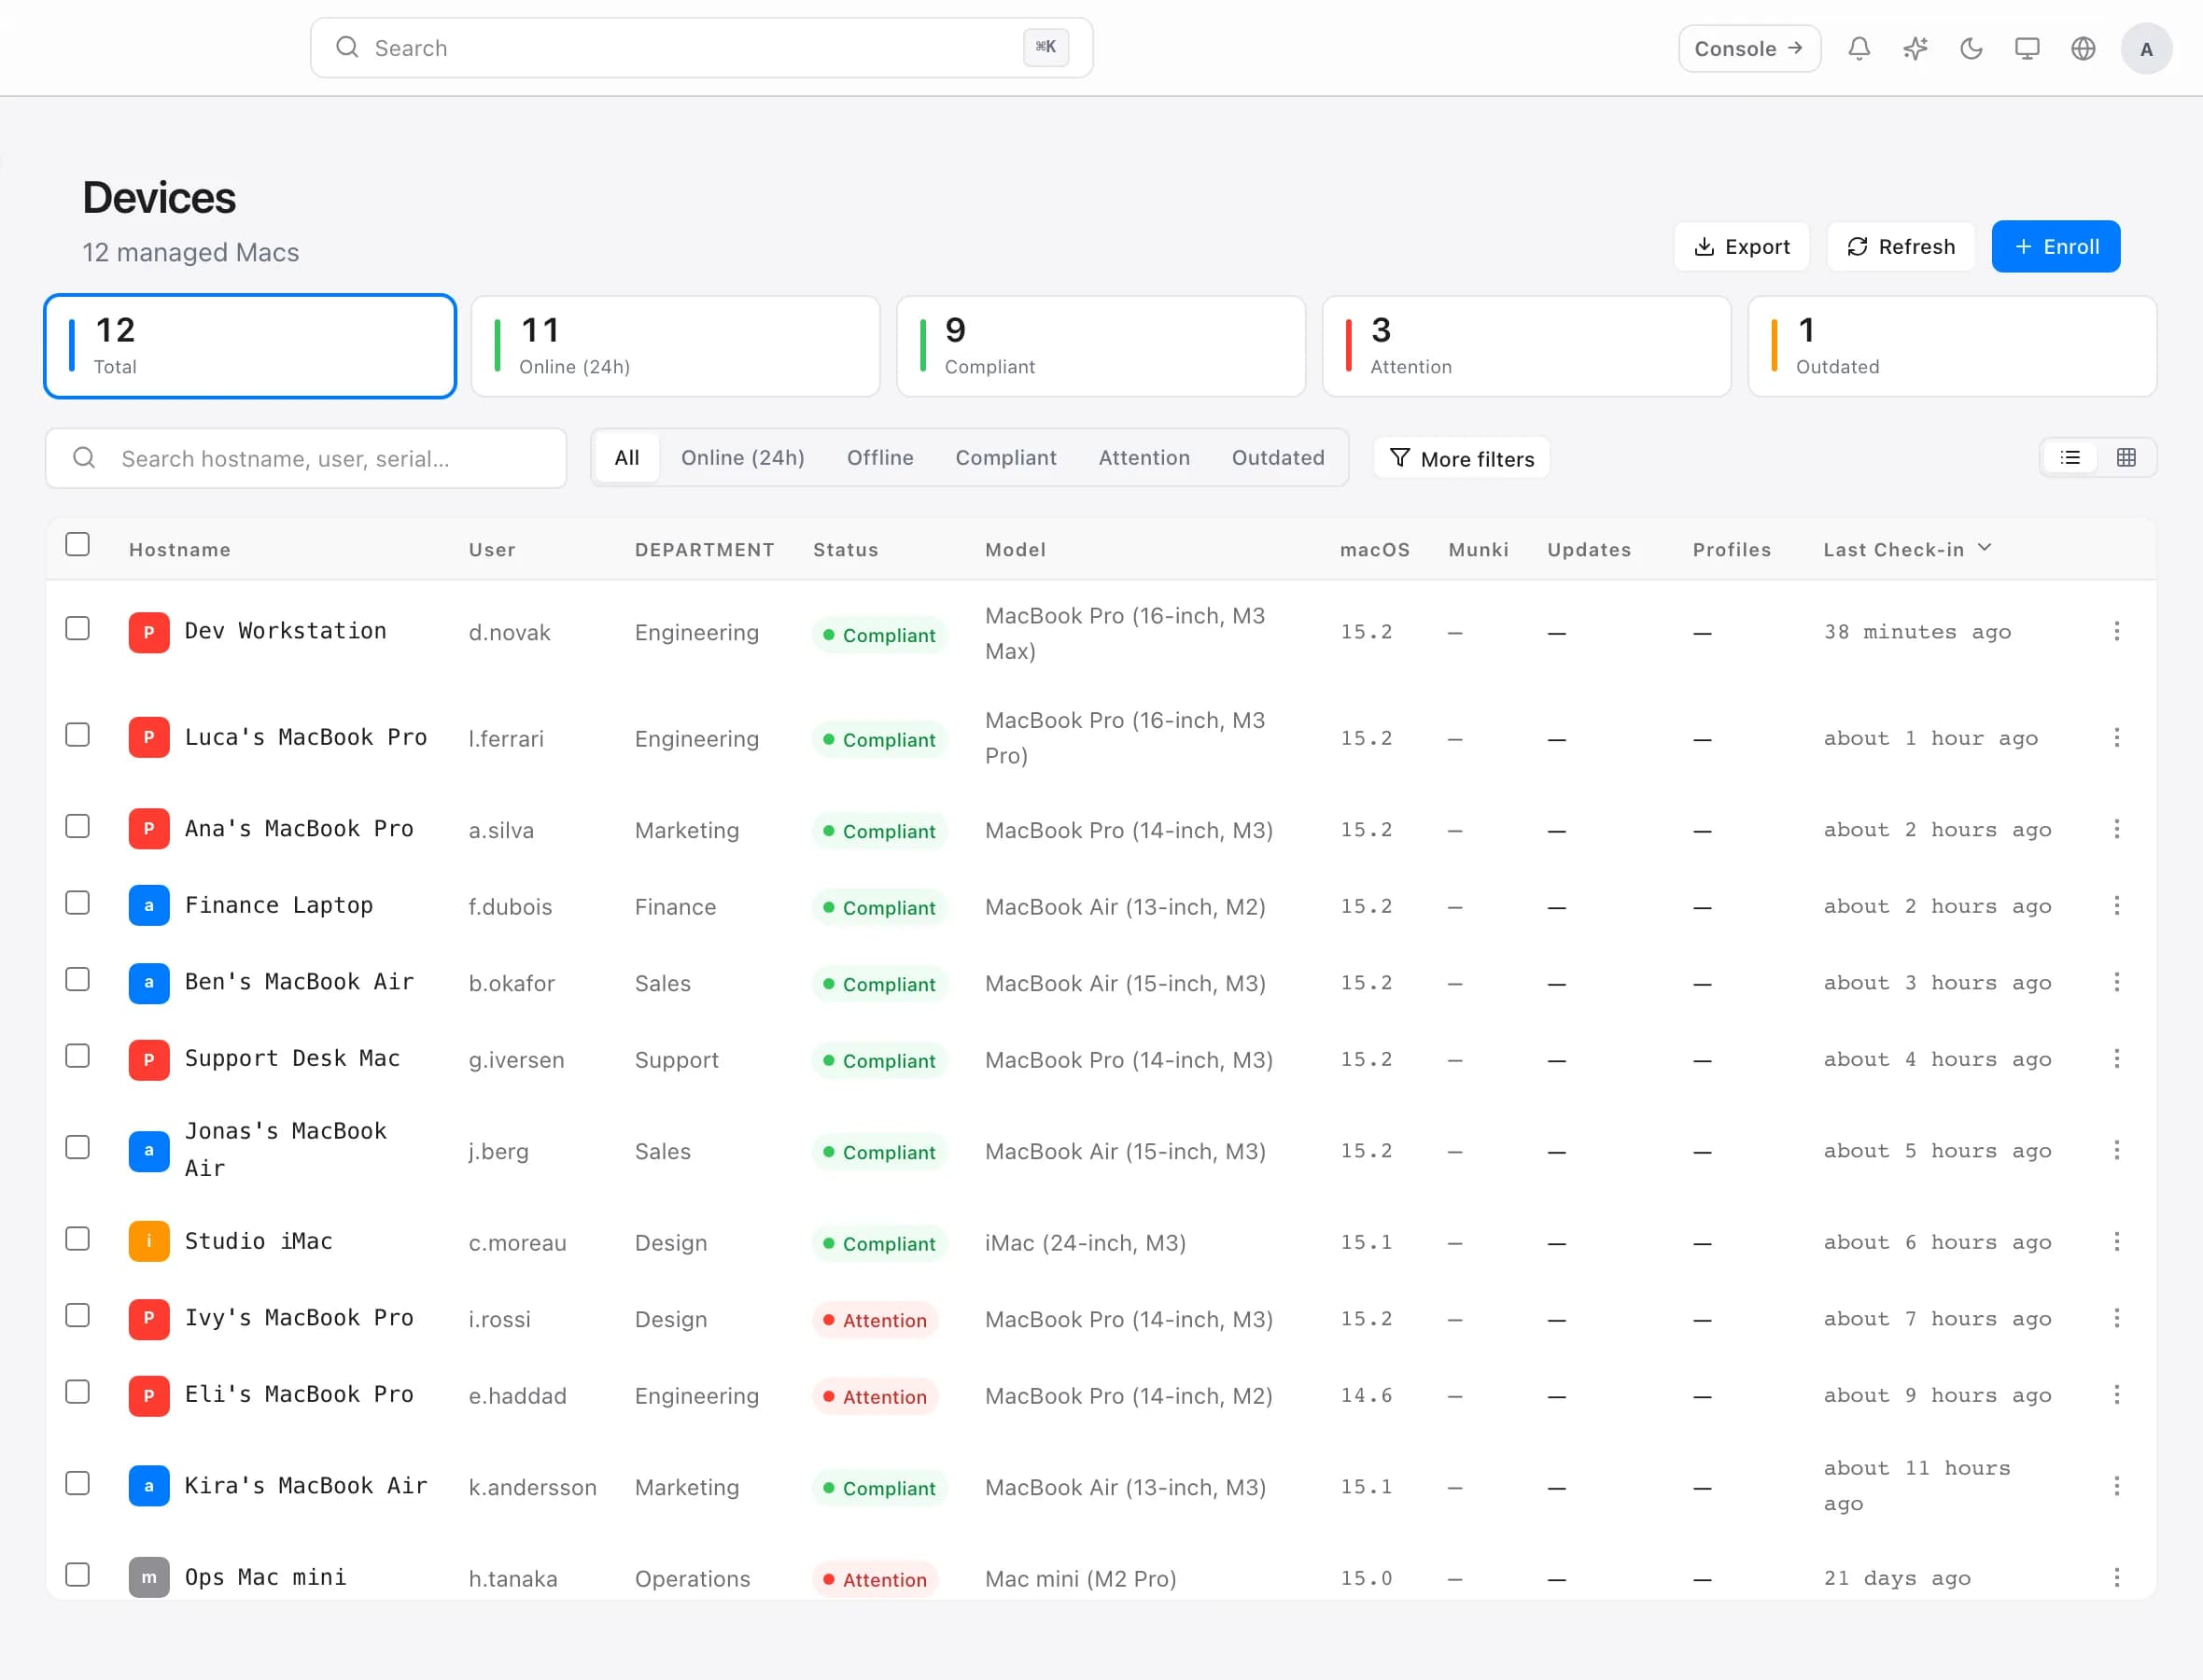
The ownMDM Devices page listing enrolled Macs with status and last check-in time.

Step 1 of 8Open Devices and choose Enrol device

The Devices page is the fleet's source of truth, and it is where enrolment starts. On a new tenant the list is empty — you are about to change that.

You should see the enrolment sheet, offering an enrolment link or an installer you can download.

  1. Open Devices and choose Enrol device

    The Devices page is the fleet's source of truth, and it is where enrolment starts. On a new tenant the list is empty — you are about to change that.

    You should see the enrolment sheet, offering an enrolment link or an installer you can download.

  2. Create an enrolment link

    The link carries a one-time token that says which organisation the Mac belongs to and how it should authenticate on its first check-in. Set an expiry if you are emailing it to someone, and revoke it afterwards if it went further than you meant.

    You should see a link you can copy, ending in /enrol/ and a long identifier.

  3. Open the link on the Mac and run the installer

    The page prepares a package, then offers it for download. Open it, approve the administrator prompt, and let it finish — under a minute. It is signed and notarised by Apple, so macOS installs it without a security warning.

    You should see the installer reporting success, and no Gatekeeper warning at any point.

  4. Wait for the first check-in

    The Mac now contacts ownMDM on its own schedule. Nothing is pushed at it. Within a minute or two it appears in Devices with its serial, model and macOS version already filled in.

    You should see your test Mac in the list, reporting a recent check-in.

  5. Go to Packages and upload one

    Drop in a .pkg or .dmg. ownMDM checks the file really is what its extension claims, hashes it in your browser before the upload starts, and fills in the name, version and publisher for you.

    You should see the app in your repository, with a version and a category against it.

  6. Put it in testing first

    A catalog is a menu, not a delivery. testing reaches only the machines you are piloting on; production reaches everyone. Promote it once you trust it.

    You should see the app listed with catalog testing.

  7. Assign it to the Mac

    Add the app as a managed install for the device or its department. Managed installs are installed and kept installed. An optional install is only offered in MacStore, and nothing happens until someone asks for it.

    You should see the app under managed installs for that device.

  8. Confirm it on the Mac

    Open MacStore on the test machine. The app appears, and installs on the next check-in — or immediately if you push it. This is the same loop that will run for the rest of the fleet, unattended, from now on.

    You should see the app installed on the Mac, and listed under the device's software in the console.

What you just built

Five things are now true, and they are the whole product in miniature:

  • The Mac comes to you. It checks in on its own schedule, so it does not need to be reachable, awake, or on your network when you make a change.
  • Its identity is a rotating trust token, issued at enrolment and replaced on every check-in. The enrolment link was needed once and never again.
  • Your software lives in your own repository, per organisation.
  • Catalogs decide what exists; manifests decide who gets it. Those are two separate questions, which is what lets you pilot safely.
  • The Mac reports back, which is where compliance and inventory come from.

Where to go next

Enrolling your first Mac

Enrol a Mac into ownMDM in about five minutes — from generating an enrolment link to confirming the device has checked in.

Read guide

Deploying software to your fleet

Upload an app, test it on a few Macs, then roll it out to everyone — without touching a single machine by hand.

Read guide

Understanding compliance status

What makes a Mac compliant, how to read the compliance view, and what to do about the machines that are not.

Read guide

Troubleshooting

The Mac never appears. Confirm the installer actually finished — a cancelled install leaves nothing behind, and re-running it is safe. Then check the Mac can reach your ownMDM address over HTTPS.

The enrolment link errors. It may have expired, been revoked, or reached its device limit. Generate a fresh one; Macs already enrolled through the old link are unaffected.

The device appears but hardware details are blank. It registered but has not completed a full check-in yet. The fields fill in on their own within a few minutes.

The app does not show up on the Mac. Check it is in a catalog the device actually receives, and that it is a managed install rather than an optional one. A device picks up changes on its next check-in, not instantly.

Last updated 8 September 2026

Next How ownMDM works
ownMDM Wiki
Open Console Contact Status GitHub

© 2026 ownMDM · Munki, multi-tenant · Apple device management.

On this page

Quick startBefore you beginThe walkthroughWhat you just builtWhere to go nextTroubleshooting